Introduction.
This assignment we are expected to show photographic examples of the theme shadow's and
lighting an also use techniques an technology safely. Plus learn about the characteristics and properties
of photographic materials an to understand these when creating our own work.
Photoshop Techniques.
We firstly started by opening photoshop and then heading over towards google and typing in something like spotty
 or acne teenager then we saved a image
then opened up into photoshop this was
the original photo.
Now once finished editing within photoshop here is the final outcome of
my photo This is just a rough copy of me clearing up the acne within the persons face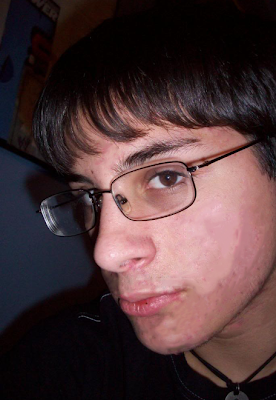
Overall i an impressed with the final outcome however this was just a quick 5 minutes of using the spot healing brush within photoshop next time i would use the healing brush so the skin tone had a smoother texture.
Photographer Research.
Ansel Adams : Ansel was mainly focused on another hobby of music before he got into photography
however he realized he became far more successful at this than playing the piano.
Although now he has passed away he has a very inspirational quote as show below “I hope that my work will encourage self expression in others and stimulate the search for beauty and creative excitement in the great world around us.”
—Ansel Adams
This quote shows he wanted over to inspire photographers of today to capture whatever they wanted an to be highly creative using the world around us his work is shown In many galleries still however the most famous is the ansel Adams gallery where prints of his work sell for thousands. Below is one of my favorite images by Ansel.
I really like this photo as the detailing an exposure in the leaves can also show that this photo may possibly been captured during the autumn season an the black an white color gives it a raw but basic eye catching look.
Jerry Uelsman- born in Detroit in 1934 Uelsman has become a extremely
successful photographer an extremely talented within using the element of
photomontage an creating very surreal photos. Jerry still has exhibitions been
shown all over the world even right now his work is being shown at boston
also along with the work of maggie taylor. He is also known now as a florida
icon due to the quote he used "
If I have an agenda, it’s to amaze myself"
This shows that Jerry's tries to recreate the shocking the unbelievable
and creative pieces of work that he would be very intrigued to look at
himself.
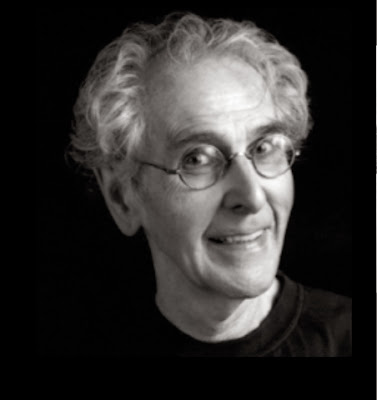
Here below is one of my favorite photos captured by jerry uelsman
simply due to the surrealism portrayed in the photo i also wonder every time i look
at this photo it gives me the chills i think what could possibly be inside that house
an why has it grown on top of the trees in what seems to look like the middle of nowhere.
Also i really like how the exposure of the photograph as come out as the composition
overall is a fantastic piece plus the fact of it being black an white shows the raw eerie
feeling similar to the work of Ansel Adams.
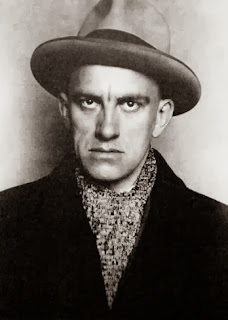
Alexander Rodchenko- Rodchenko born in Russia on the 5th of dec 1891. Before becoming a photographer an great photomontage artist rodchenko was known for being an artist sculptor and graphic designer and the most versatile artists to emerge after the russian revolution. Most of the shots he captured were at very surreal angles usually from very high above to shock the viewer of his work
he quoted "one
has to take several different shots of a subject, from different points of view and in different situations, as if one examined it in the round rather than looked through the same key-hole again and again." this shows that he liked to see photos of the same object however just from completely different perspectives. His work has inspired many even music album covers such as dutch punk band the ex to use the theme of highlights and shadows an even his self portrait shows this theme due to the background an the highlight of his face.
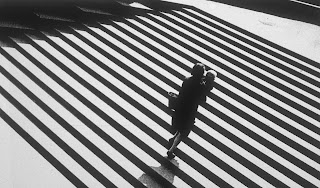
Definitely Rodchenko's Most famous piece however i really like this piece as it definitely refers to the odd angles he used an i think it captures a story of a woman making a journey hence why she is heading up the stairs with a child. Also i really like the composition of the piece as the shadowing on each step makes this intriguing because at first glance i could not tell whether she was walking along a striped road or up some stairs.
My Own Highlights An Shadows Photo's.
I thought i would go out on a shoot an try create some of my own highlights an shadows pictures however some are also captured within the college's studio using lighting.
 Here is a Highlighted Photo i took of my skating shoes i thought this came out well as the detailing of the dirt on the shoe really stands out to me.
Im really happy with this shot as the shadow of the is shown on the floor and makes this piece look rather mysterious but however intriguing.
Here is a Highlighted Photo i took of my skating shoes i thought this came out well as the detailing of the dirt on the shoe really stands out to me.
Im really happy with this shot as the shadow of the is shown on the floor and makes this piece look rather mysterious but however intriguing.
 This one i shot down a deserted alley way i look how the detailing of the bricks gets even more detailed as the light creeps in from the right hand corner.
Here is one i got of my friend skateboarding i like this photo a lot however i think it would look loads better if i used another flashgun at the left hand side of this picture or came closer to the skateboarder as the person isn't so clear to the lens. Also next time i would change the shutter speed to lighten the picture an possibly of changed my ISO number.
Here is a studio photo i took of my friend skye she is sat in front of a black backdrop and the light is positioned to the right so it created the shadow on the left hand side and obviously the highlight of her face within the right overall I'm happy with this composition however i didn't realize till after my ISO number was too high so for future references i will turn down the ISO number an increase my shutter speed so there is no fuzzy texture to the photo also i think this could of affected the focus of the picture too.
Here is another highlights photo however this time we used our phone lights or a torch to highlight a specific object in the dark i am happy with this image as you can see the detailing on the bottle brilliantly an it really highlights the color's of the label leaving a glistening shine on the bottle.
Health And Safety.
Whilst Shooting in the studio you need to have a basic knowledge of health and safety here below are just a few bullet points for what you should check every time before taking images within the studio.
- Identify hazards.
- Decide who might be harmed and how.
- Evaluate the risks and decide on precautions.
- Record your findings and implement them.
- Review your assessment and update if necessary.
Four Final Images.
This one i am really happy and i chose this as one of my final images because i think this really highlights the skateboarder an im really glad i caught the action of the shot however i do think that if i was to take this picture again i would reduce the iso number an make it darker as the building would look more interesting an appealing to the eye.
This is my favorite studio portrait photo i have ever taken simply due to the whole aesthetic look an composition of the work overall i think the light on the right hand side of the face showed a good skin complexion but however there is room for improvement as next time i would turn down the lights brightness next time so there is not such a shiny effect on the nose and maybe adjust the lights position so there is more of shadow of the back of the head.
This is another image i am really happy with an decided to put into my top four im really happy how the flashgun showed all the detailing of the skateboarder and the black white contrast gives it a raw feel to it however i think there is room for improvement with the flashgun i think the flash is a tad too bright so next time i would improve this by turning it down.
 This is one of my favorite photos i took of my friend Gemma Hopton she is a singer
in her spare time and asked me to take some photos for her website so she could
advertise herself . I'm really happy with the overall outcome of the photo and the vibrant light shows the the texture of the face.
This is one of my favorite photos i took of my friend Gemma Hopton she is a singer
in her spare time and asked me to take some photos for her website so she could
advertise herself . I'm really happy with the overall outcome of the photo and the vibrant light shows the the texture of the face.
Evaluation.
The products name was called highlights and shadows an i found this a real interesting subject to learn as it also taught us how to take pictures of landscapes in some sort of aspect. The highlights topic was my favorite as it gave me more knowledge on how to use the lights in the studio. I think that next time i would go about things a little differently by experimenting with shadows technique.


